Git window
Manage a project while reviewing changed files and history.
Before using the Git window
Git tracks the history of file changes. Select a working folder that is a Git repository, then open the Git window. A regular folder needs to be set up as a Git repository first. If Git installation or repository status has a problem, read the error shown in the app first.
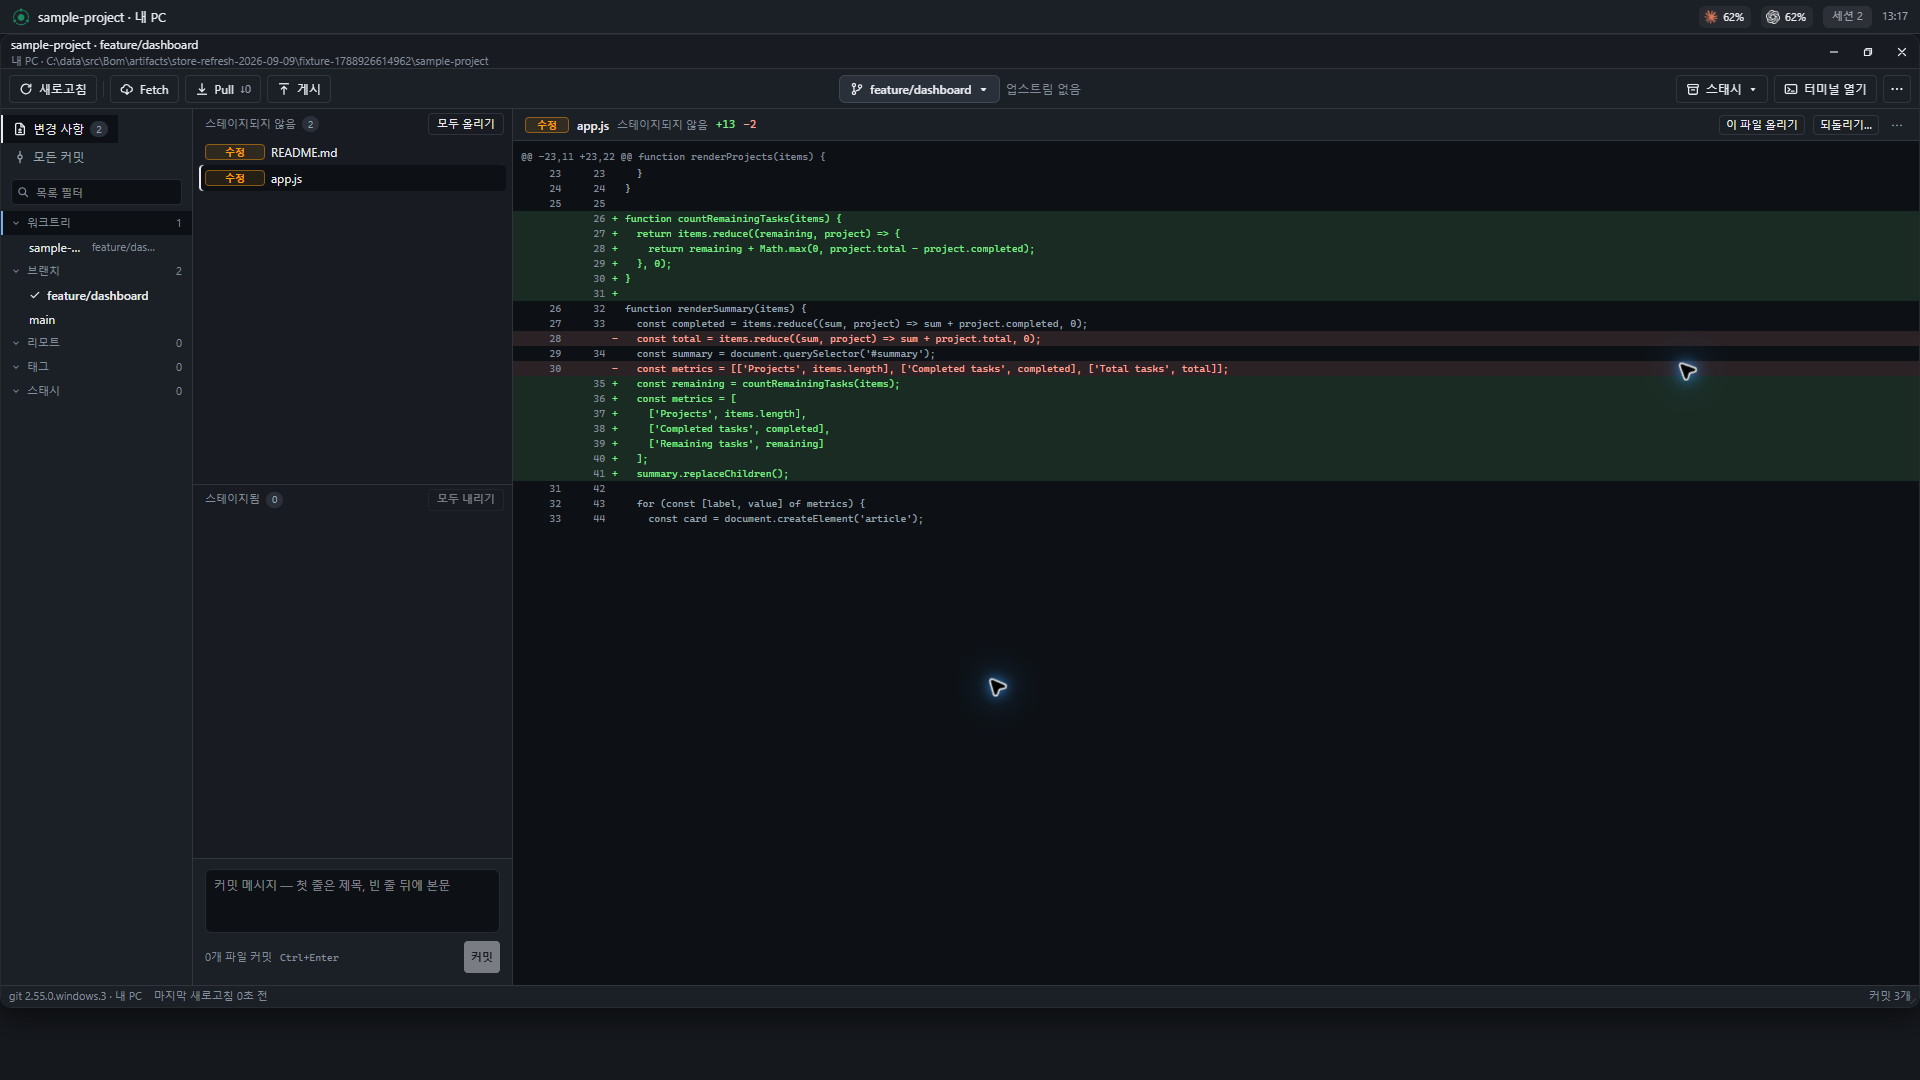
Save changes in your first commit
- Edit files in the working folder.
- Select the edited files in the Git window’s changed-files list.
- Read the actual diff and check that the changes are what you intended.
- Stage the files to include in this commit. You do not have to include all changes at once.
- Commit with a message that describes the purpose, such as “Add installation steps to the user guide.”
- Find the new entry in the commit graph.
Common terms
| Term | Meaning |
|---|---|
| Changed files | Files changed since the last recorded version |
| Staging | Selecting changes for the next commit |
| Commit | A record of selected changes |
| Branch | A separate line of work |
| Stash | A way to temporarily save changes in progress |
| Tag | A name attached to a particular entry in history |
Sync with a remote repository
Fetch retrieves new information from the remote. Pull applies its changes to your current work, and Push uploads your history to the remote. You need the remote repository address and authentication set up. If a conflict occurs, inspect the files, resolve it, and continue.
Switch branches
If you have changes in progress, first decide how to save them, such as by committing or stashing. Review the target branch’s changes along with your current work, and follow the confirmation shown in the app. Viewing history and changing the state of files are different actions.
Review after AI work
When an AI edits files, read the changed-files list and diff again. Check that the scope is right and that no secrets or generated files were included. If the project needs tests, check their results before committing.